Inequalities on a Number Line Worksheets
All worksheets are created by the team of experienced teachers at Cazoom Maths.
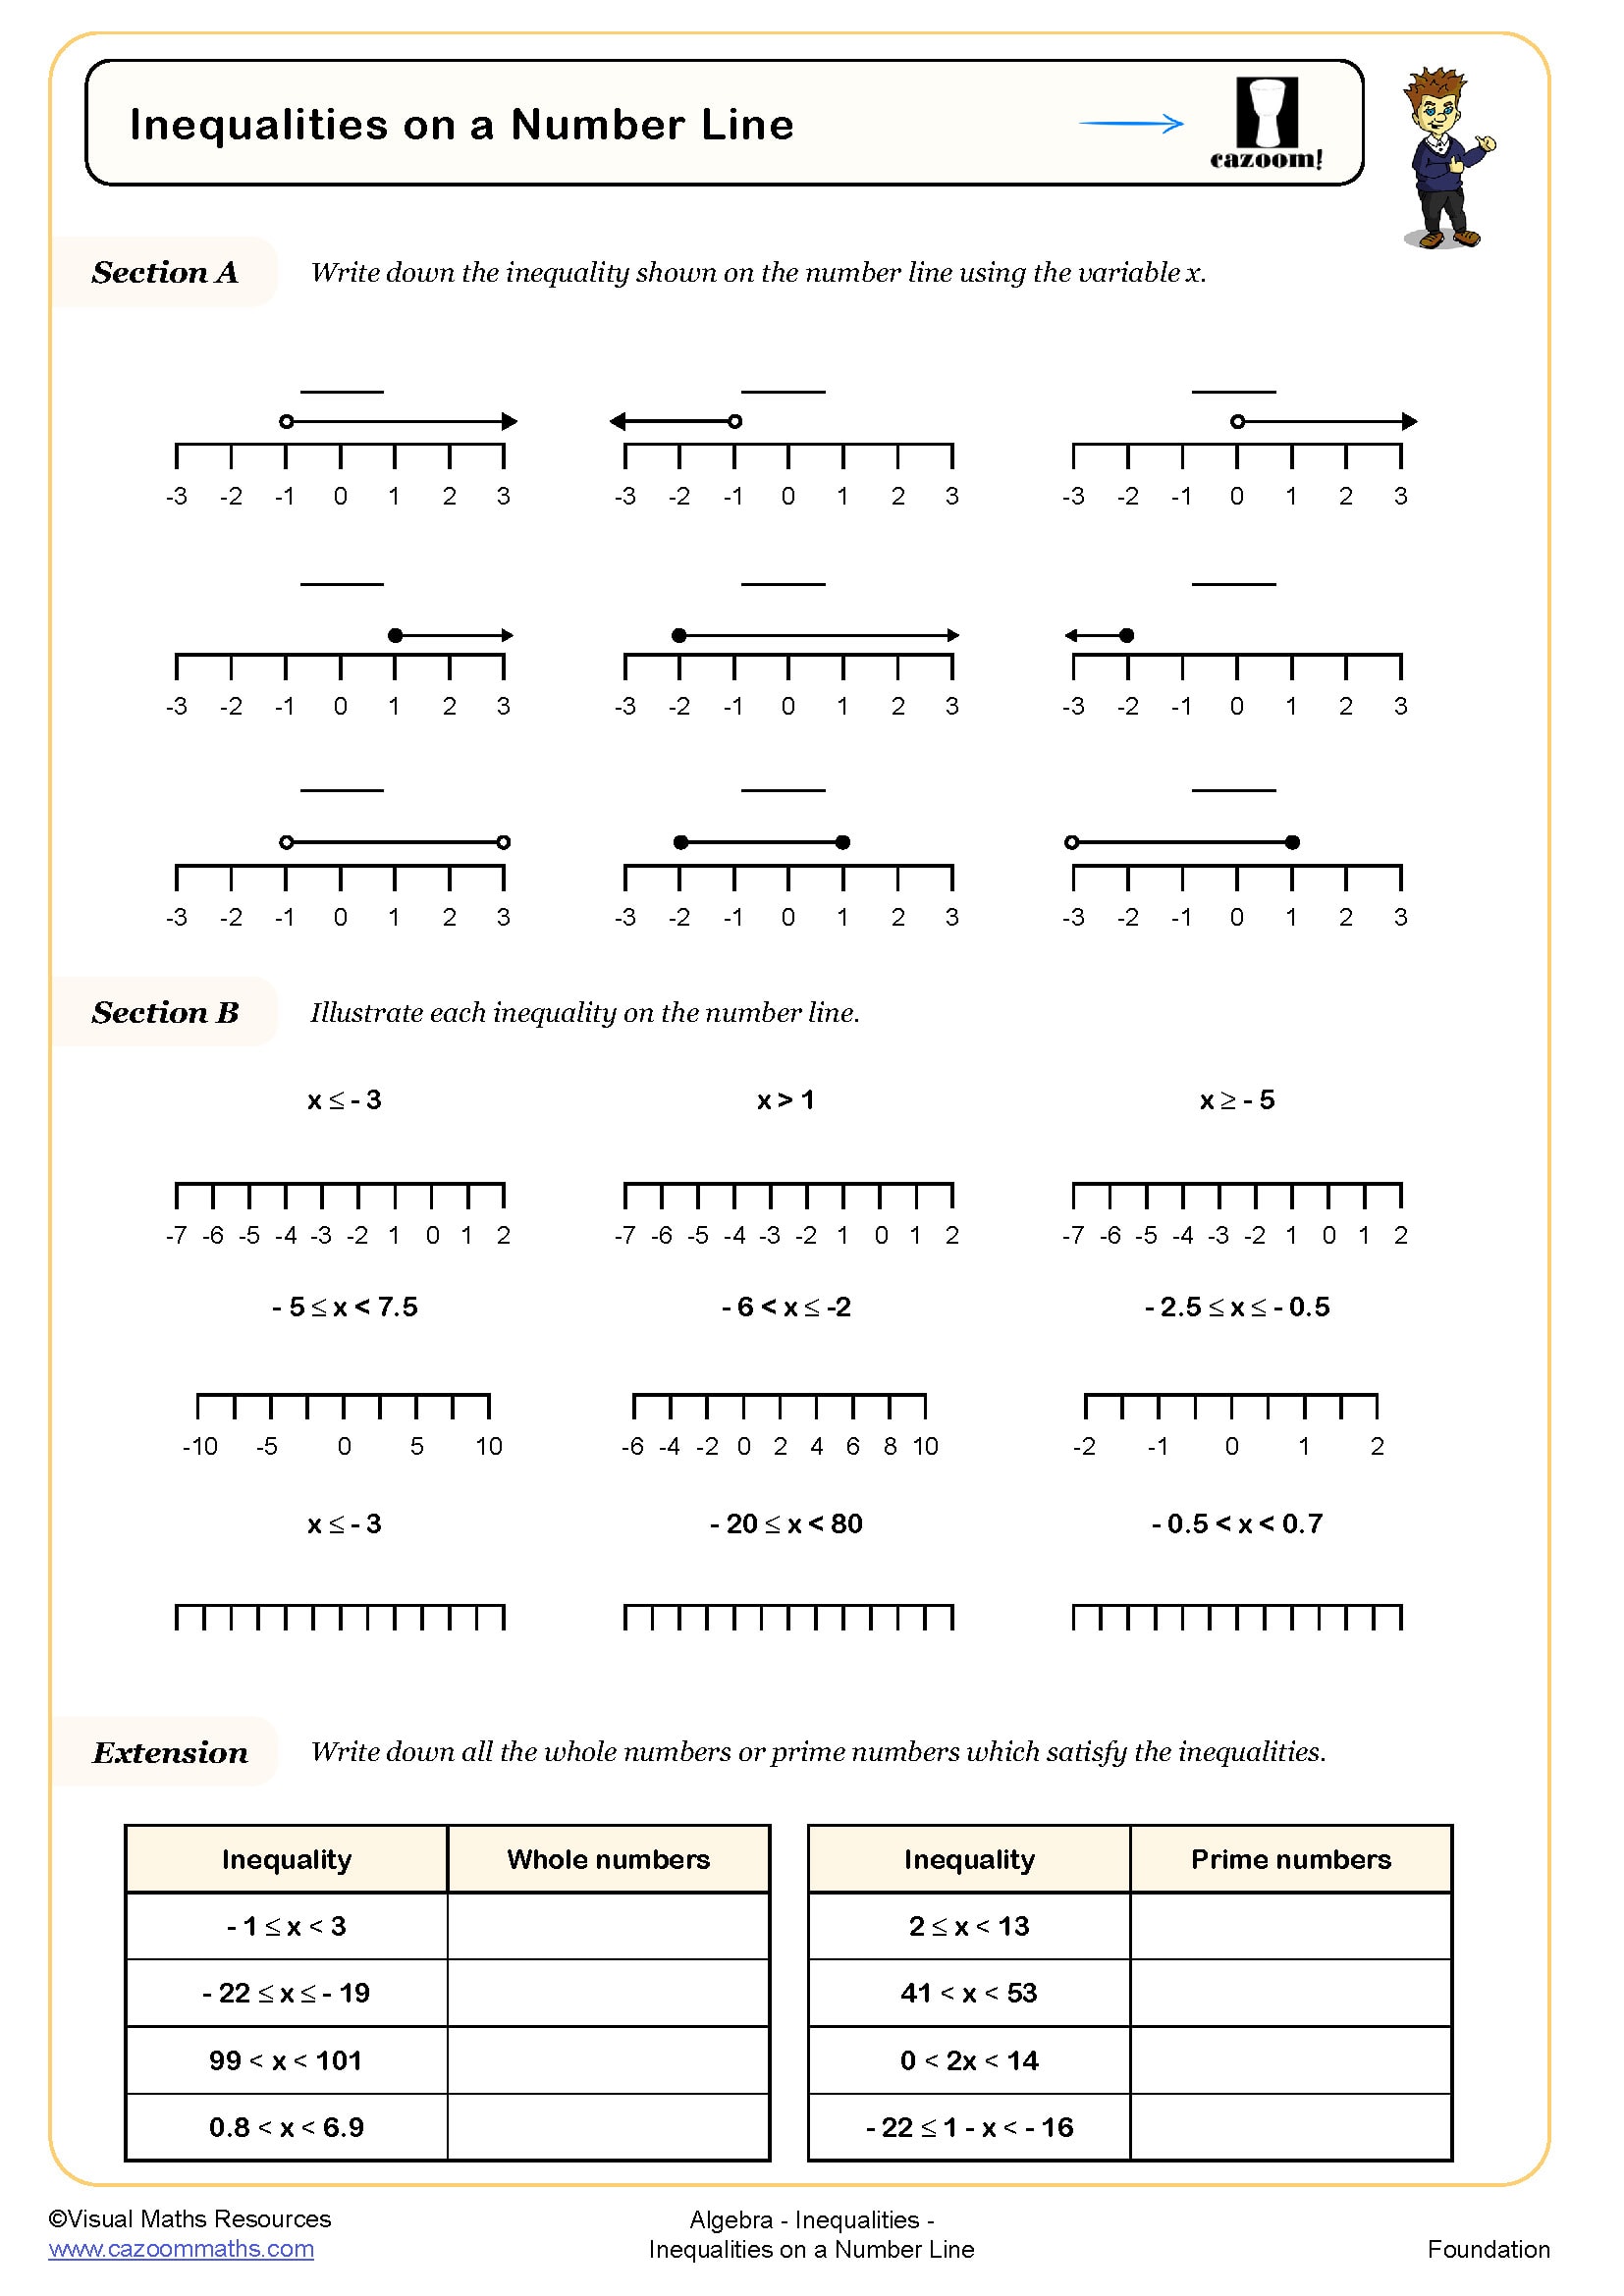
What are inequalities on a number line?
Inequalities on a number line provide a visual representation of the range of values that satisfy an inequality statement. Rather than showing a single solution point, students shade a region of the number line to indicate all possible values. The notation is crucial: an open circle shows that a boundary value is not included (< or >), whilst a closed circle indicates the value is included (≤ or ≥).
This graphical method helps pupils understand solution sets intuitively, particularly when dealing with statements like x > 3 or x ≤ -2. The visual approach supports algebraic understanding and prepares students for more complex work with inequalities at GCSE level, including solving and graphing linear inequalities in two variables.
Which year groups learn about inequalities on a number line?
Inequalities on a number line feature in the KS3 National Curriculum, typically introduced during Year 7 and developed further in Year 8. At this stage, students build on their understanding of the number system and begin working with algebraic concepts that extend beyond simple equations with single solutions.
Year 7 pupils usually start by interpreting and representing simple inequalities, whilst Year 8 students tackle more challenging problems involving negative numbers, compound inequalities, and forming inequalities from written descriptions. This foundational work establishes the skills needed for GCSE Mathematics, where inequalities become increasingly important across both Foundation and Higher tiers.
How do you know whether to use an open or closed circle?
The choice between open and closed circles depends on whether the boundary value is included in the solution set. A closed (filled) circle indicates that the number is part of the solution, corresponding to the symbols ≤ (less than or equal to) or ≥ (greater than or equal to). An open (hollow) circle shows the boundary value is excluded, used with < (less than) or > (greater than).
Many students initially struggle with this distinction, so repeated practice is essential. Our worksheets include varied examples that require pupils to both draw inequalities from given statements and write inequality notation from number line diagrams. This two-way practice reinforces understanding and helps students recognise the relationship between algebraic symbols and graphical representation.
What's included with these inequality worksheets?
Each worksheet downloads as a PDF, ready to print for immediate classroom use or home learning. The resources include carefully structured questions that progress in difficulty, allowing students to build confidence gradually. Questions typically require pupils to represent inequalities on provided number lines, interpret existing diagrams, and match algebraic statements to their graphical representations.
Complete answer sheets accompany every worksheet, showing the correct notation and shading for each inequality. These detailed solutions support marking efficiency for teachers and enable students to self-assess their work effectively. The clear visual answers help pupils identify exactly where they've made errors, whether in circle notation, shading direction, or boundary value placement.